Enrollment
Enrollment is the process of attaching a Location to an Account. This process is essential for activating electricity service for a consumer. It is one of the first steps in the Account lifecycle after the account has been created.
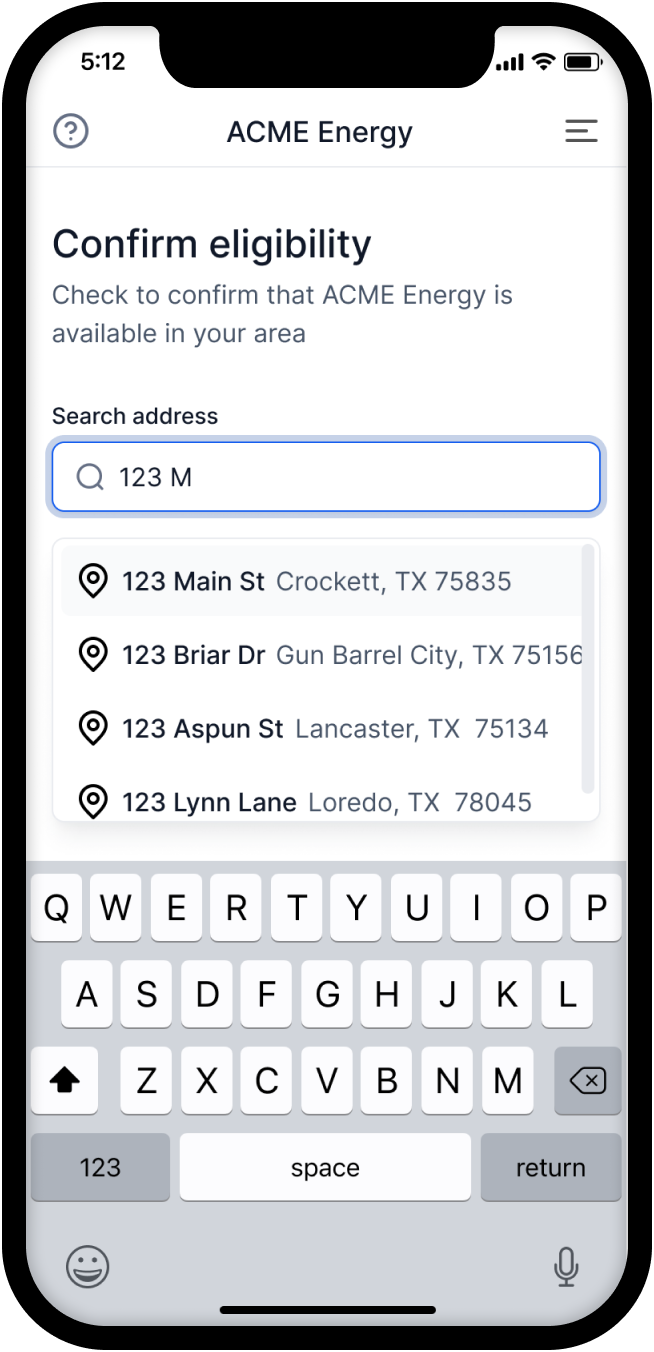
Search by address
In the example below, we use the /account/enroll/address-search API to search for an eligible address to enroll. Not every address is eligible for electricity retail choice, so it is important to be able to search and match the user's address to a valid utility service address. In Texas, valid addresses are identified by their ESI ID, a unique identifier designated by ERCOT.
This API helps you map an address to its corresponding ESI ID by returning a list of addresses (and their ESI IDs) which match the search query. The search uses a fuzzy search algorithm to match the query to the address even if the query is not an exact match.
This API is provided as a convenience. However, because it uses fuzzy search and certain addresses can be very similar, it is critical that customers review and confirm the selection of their full address in a separate step and not rely on the ordering of the results from this API.
POST /account/enroll/address-search
Example request payload
{
  "query": "123"
}
Example response payload
[
  {
    address_1: "123 Main St",
    address_2: "Apt 1",
    city: "Dallas",
    state: "TX",
    postal_code: "75201",
    esi_id: "55512345671234567",
  },
];
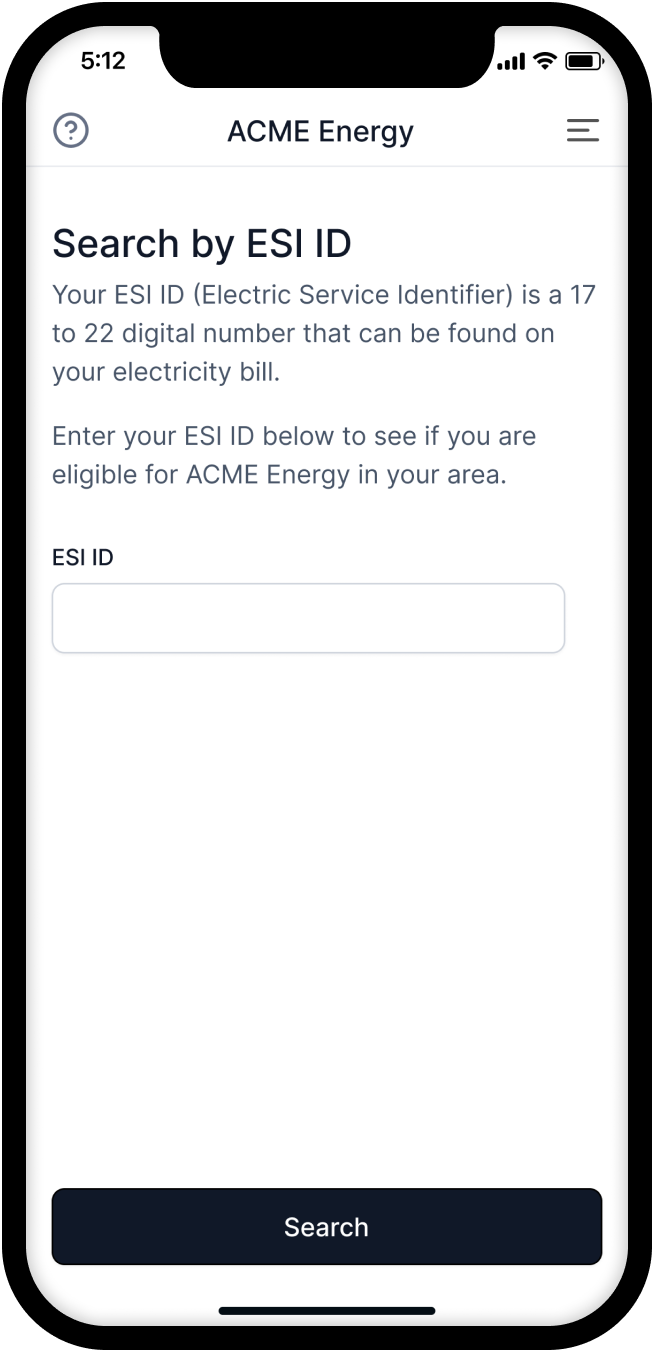
Search by ESI ID
You can also identify a Location directly by ESI ID. This is a useful alternative to /account/enroll/address-search when the user has their ESI ID available and wants to enroll in a plan using that ESI ID. They can usually find their ESI ID on a previous electricity bill.
We recommend providing this as a fallback for when the address search does not return any results. This can sometimes be the case if the format of the addresses correlated with the ESI ID is sufficiently different from the address the user is searching for.
POST /account/enroll/esi-id-search
Example request payload
{
  "esi_id": "55512345671234567"
}
Example response payload
{
  "address_1": "123 Main St",
  "address_2": "Apt 1",
  "city": "Dallas",
  "state": "TX",
  "postal_code": "75201",
  "esi_id": "55512345671234567"
}
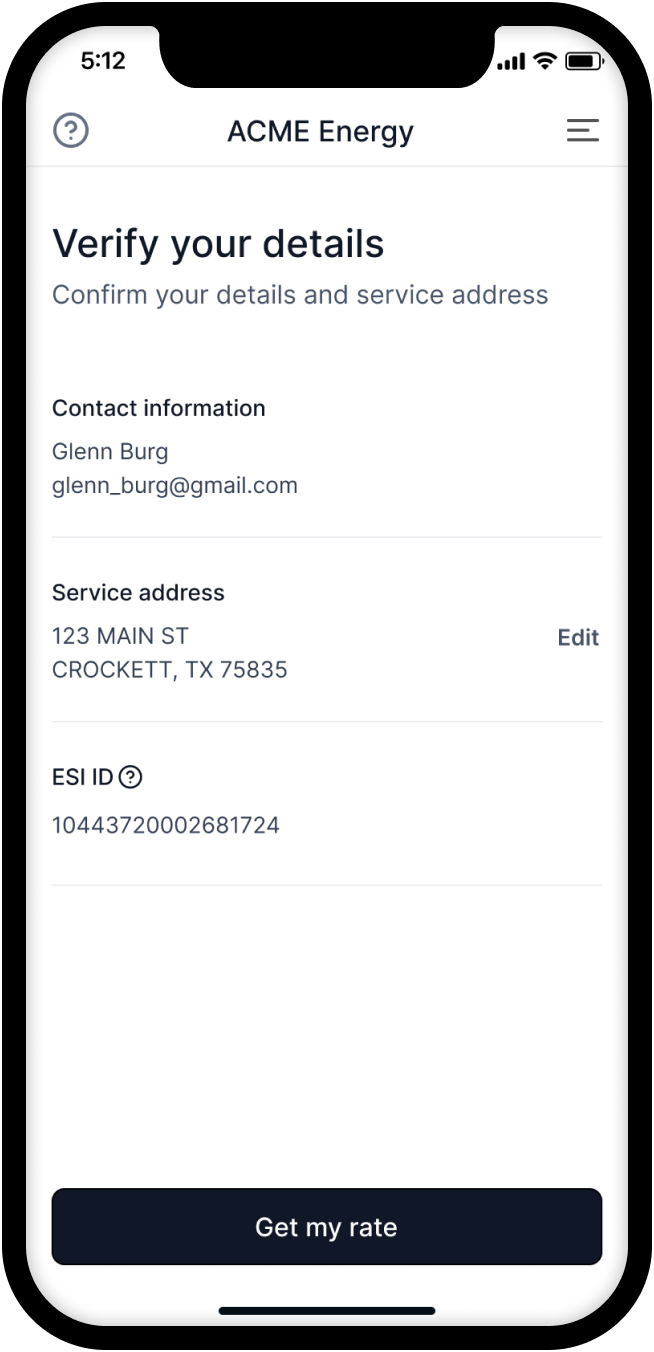
Confirming the address response
However the ESI ID is determined, and in particular if using account/enroll/address-search, the user must confirm the address details before proceeding with the enrollment process to prevent faulty or delayed enrollments. The utility account number (ESI ID) should also be shown to the user to confirm that they are enrolling the correct service location.
Here is an example of what an integration might show a customer using that address response from the search above.
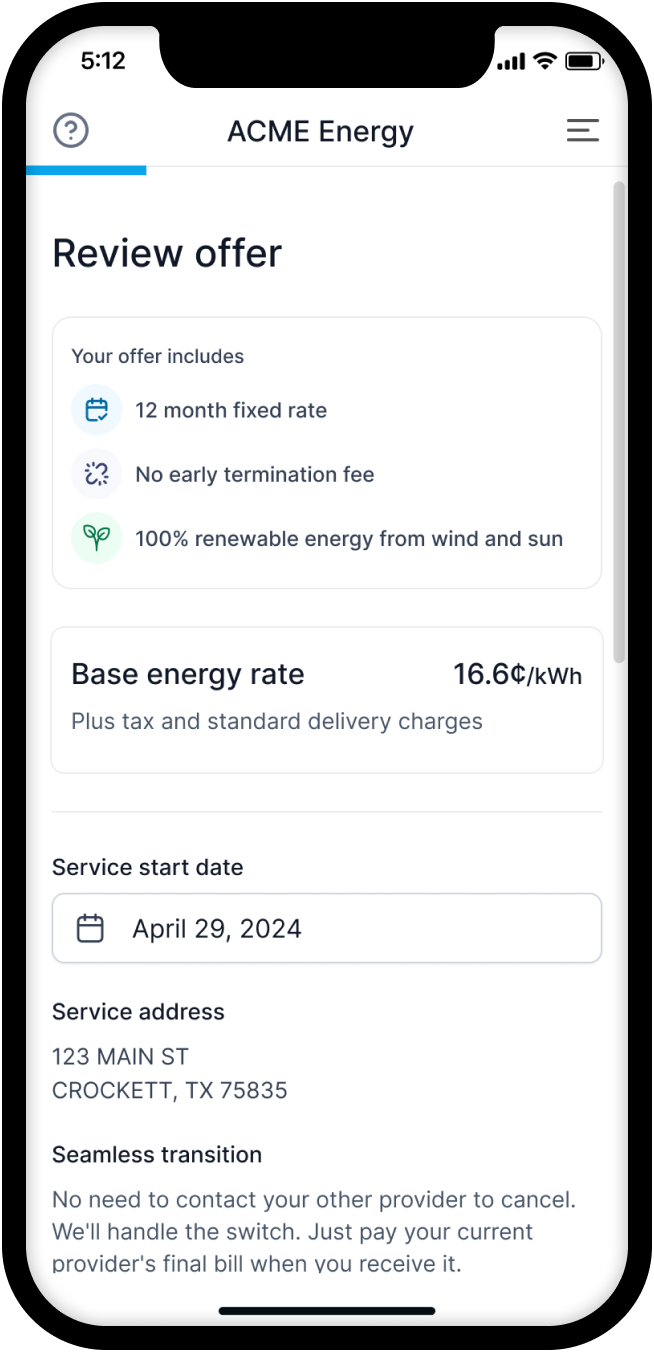
Requesting available plans
After the service location address is confirmed, the next step is to request available plans for the address. This can be done by using the /account/enroll/plans/request API. This API will return a list of available plans for the address in which the user can enroll. The plans shown here will be those that you have customized for your App and the user's location.
The plans contain details about all of the sub-components that make up the plan. This includes the energy rate, delivery (TDU) rates, monthly plan charges, term length, and links to the Electricity Facts Label (EFL) and Terms of Service (TOS) documents. The user can review these plans and select one to enroll in.
POST /account/enroll/plans/request
Example request payload
{
  "esi_id": "55512345671234567"
}
Example response payload
[
  {
    uuid: "123456-1234-1234-1234-123456789012",
    term_months: 12,
    energy_rate_cents_per_kwh: "14.2",
    earliest_start_date: "2022-01-01",
    latest_start_date: "2022-01-31",
    links: {
      efl: "https://example.com/efl.pd",
      tos: "https://example.com/tos.pdf",
      yrac: "https://example.com/yrac.pdf",
    },
    // ... further plan details shown in the API reference
  },
];
The pdf document links above will be provided for your plans and must be linked to from your app for the user to review as needed. The plan details and variables that are contained within the EFL and TOS documents are also available in the API response for displaying some of the key components to customers in your app (for example the energy rate and term length).
Accepting the plan
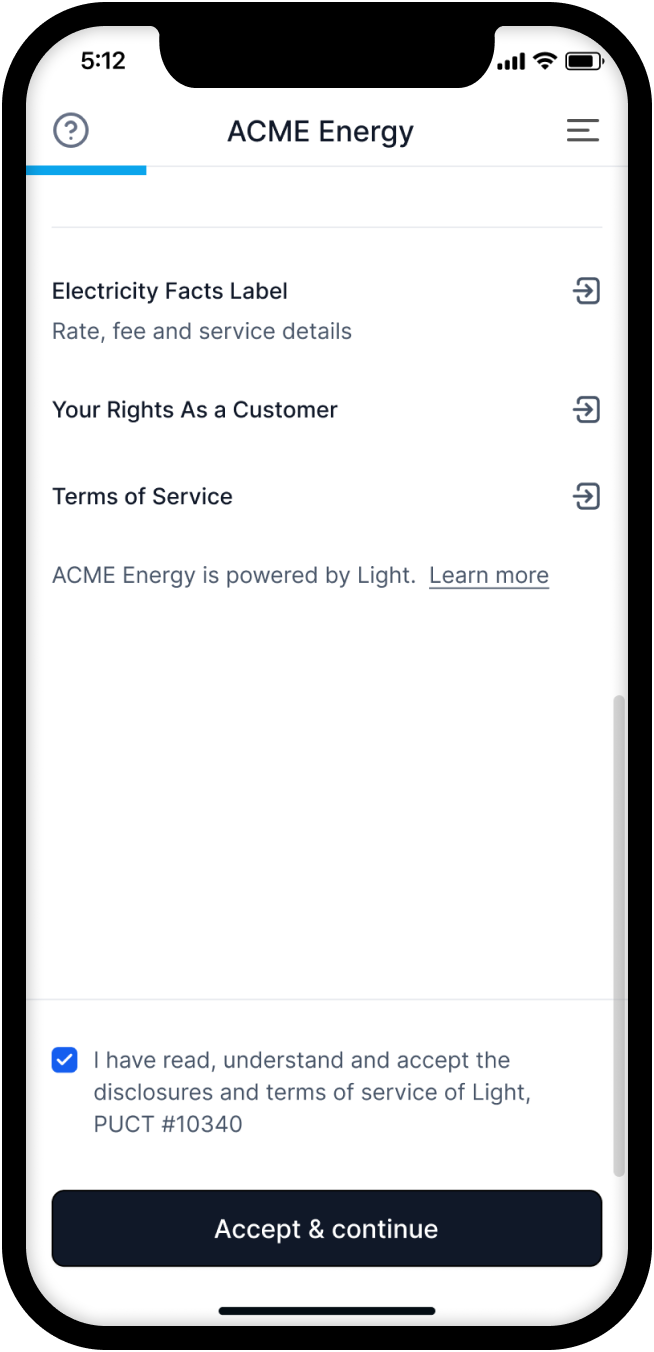
After the user has reviewed the available plans, they can select a plan to enroll in. This can be done by using the /account/enroll/plans/accept API. This API will enroll the account in the selected plan. In the visual example above, this would be equivalent to the user clicking the button at the bottom of the screen to accept the plan.
POST /account/enroll/plans/accept
Example request payload
{
  "esi_id": "55512345671234567",
  "plan_uuid": "123456-1234-1234-1234-123456789012",
  "start_date": "2022-01-01",
  "terms_accepted": true
}
The terms_accepted field must be set to true to indicate that the user has accepted the terms of the plan. The start_date field must be set to a date within the range of the earliest_start_date and latest_start_date fields from the plan details.
Calling this API will create a Location for this account and enroll it in the selected plan. However, the enrollment won't be finalized until any other remaining blocking enrollment components are completed (like the billing address confirmation or payment collection). Those could be done prior to accepting or after, depending on your app's design.
Verifying identity
As part of the enrollment process, users must verify their identity to ensure compliance with regulatory requirements. This step helps protect against fraud and ensures the account is being set up for the correct individual.
The minimum information required to start service includes first and last name, phone number, email, and date of birth.
Set these fields when you create a user's account using POST /app/accounts, or collect it later and send via PATCH /account.
Once you have set these critical fields, confirm you are ready to check the customer's identity and supply additional information using POST /account/enroll/identity.
The more information provided, the stronger the likelihood of successful identity verification.
Checking credit
By default, we will perform a required soft credit check to determine your customer's eligibility.
The credit check requires the user's full Social Security Number (SSN) and explicit consent to the terms of the credit check.
Use POST /account/enroll/credit-check to initiate the credit check step.
Upon successful submission, the credit check will be processed in the background. The results will be available through the account status and can affect the final enrollment approval.
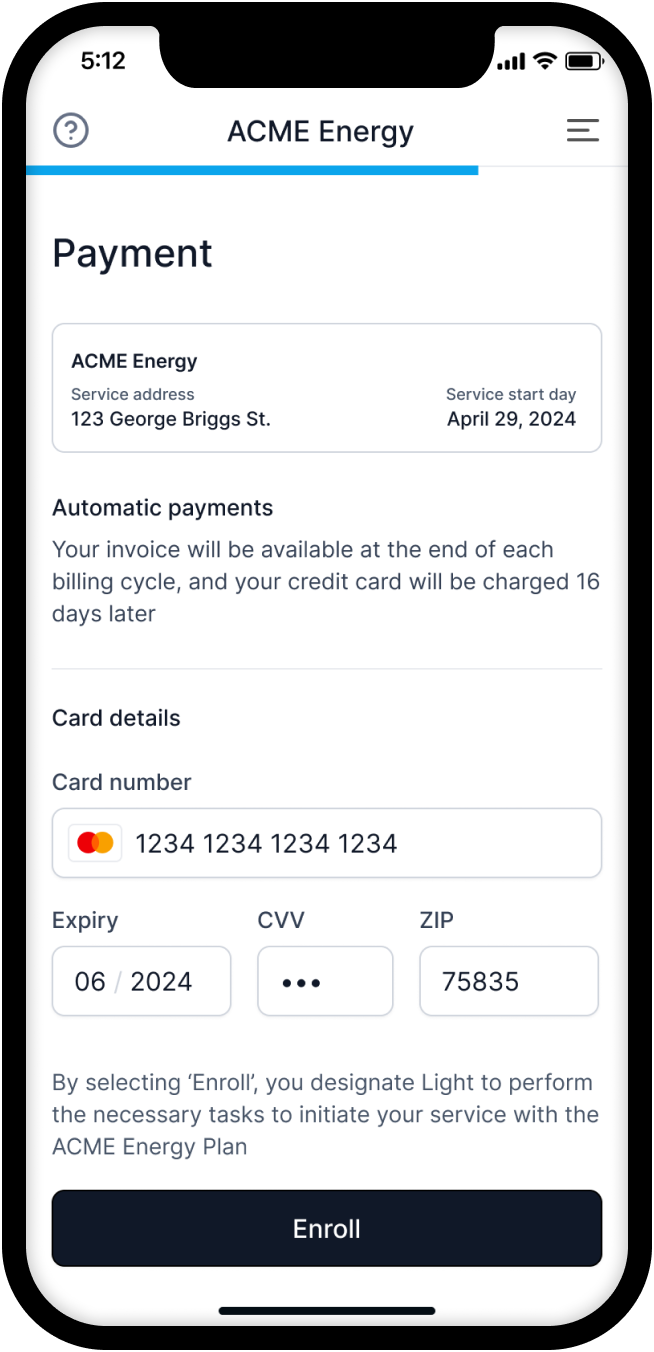
Adding a payment method
By default, a payment method is required to enroll in a plan. Light can handle payments for you, or you can use your own payment method and call our APIs. If you want Light to collect payments for you, we currently support credit cards using Stripe for simplicity and low friction. If you are planning to use your own payment processing, reach out to us to discuss the best way to integrate.
If you are using our built-in Stripe integration, you can access a Stripe public key in our /account payload to use in the various Stripe Checkout or Stripe Elements components that work with your frontend stack. If you are working in the sandbox environment, then this public key will be a Stripe test key with which you can use the standard Stripe test card numbers.
Along with this key, you will need to create a payment session when you want to add a new payment method using the POST /account/billing/payment-session API. This API will return a client secret that you can use to create a payment method using Stripe Elements.
After the payment method is added to Stripe, you will need to confirm with Light by using the POST /account/billing/ensure-payment-method-added API. This API simply takes the payment_method_id that is returned by the Stripe client SDK. Passing this to us will confirm that the payment method was successfully added through Stripe and sync it with the customer's Account on Light, so that they can continue with the enrollment process.
The payment method will not be immediately charged through these APIs; rather, it is saved to the customer's account for regular auto-pay invoice billing based on their next billing cycle. By default, Payments are charged for the amount due on an invoice 16 days after the invoice is generated.
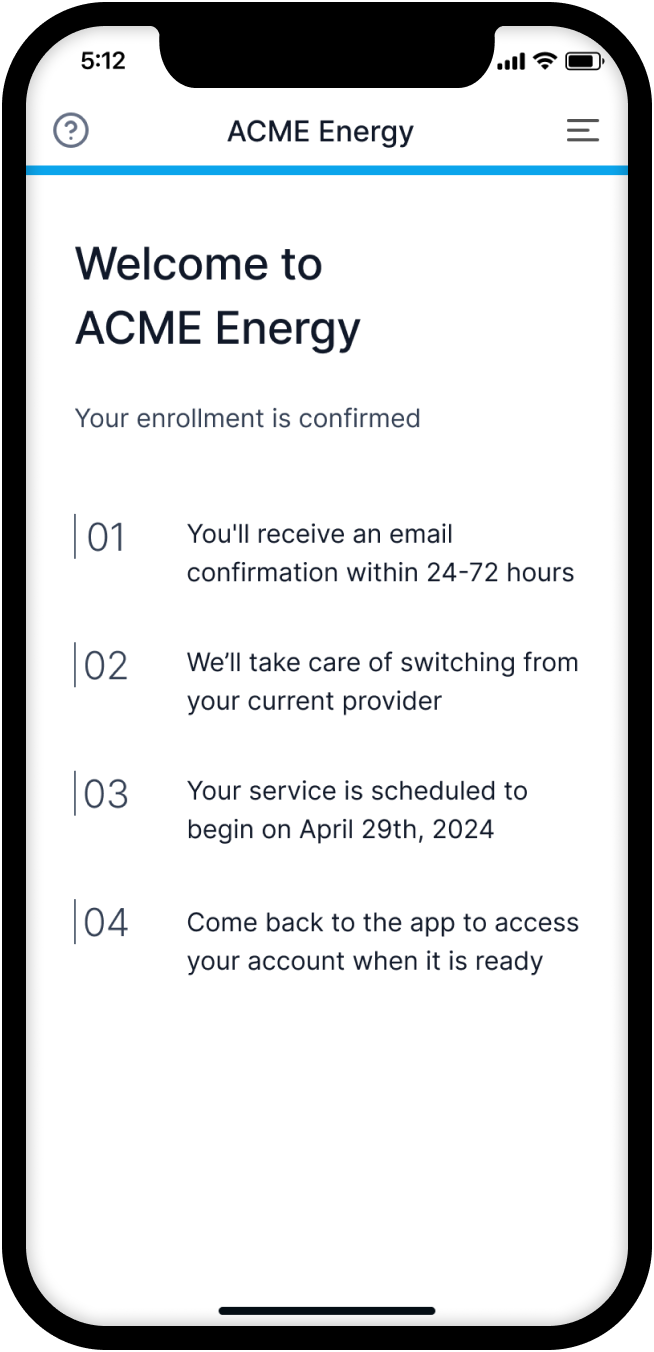
Finalizing the enrollment
After an Account has accepted a plan, confirmed their billing address, and added a payment method, the enrollment for this location will be processed for the start date selected. It can take anywhere from 2 to 72 business hours to complete the enrollment process depending on the utility and the time of day the enrollment was initiated, if the start date selected was the same day.
We recommend showing a confirmation screen similar to this one until the Account's service is active:
Once the utility has accepted the enrollment, the service will be marked as active in the /account API response.
GET /account
Example response payload
{
  "enrollment": {
    "is_service_active": true,
    "has_usage_history": false,
    // ... further enrollment details shown in the API reference
  },
  // ... further account details shown in the API reference
}
The is_service_active field will be set to true when electricity service is active.
The utility will also supply their usage history for the previous 12 months if available when enabling the service. This information is not received at the exact same time and may be available some hours before or after the service is active.